Work Text:
Materials
Light blue cotton fabric, ¼ yd
Fusible interfacing, ¼ yd
Light blue embroidery floss, 2 skeins
Black bias tape, 1 pack
Light blue sewing thread
Fabric paint or markers in white, black, and brown (and a skin tone if you can get one, or blend from the others)
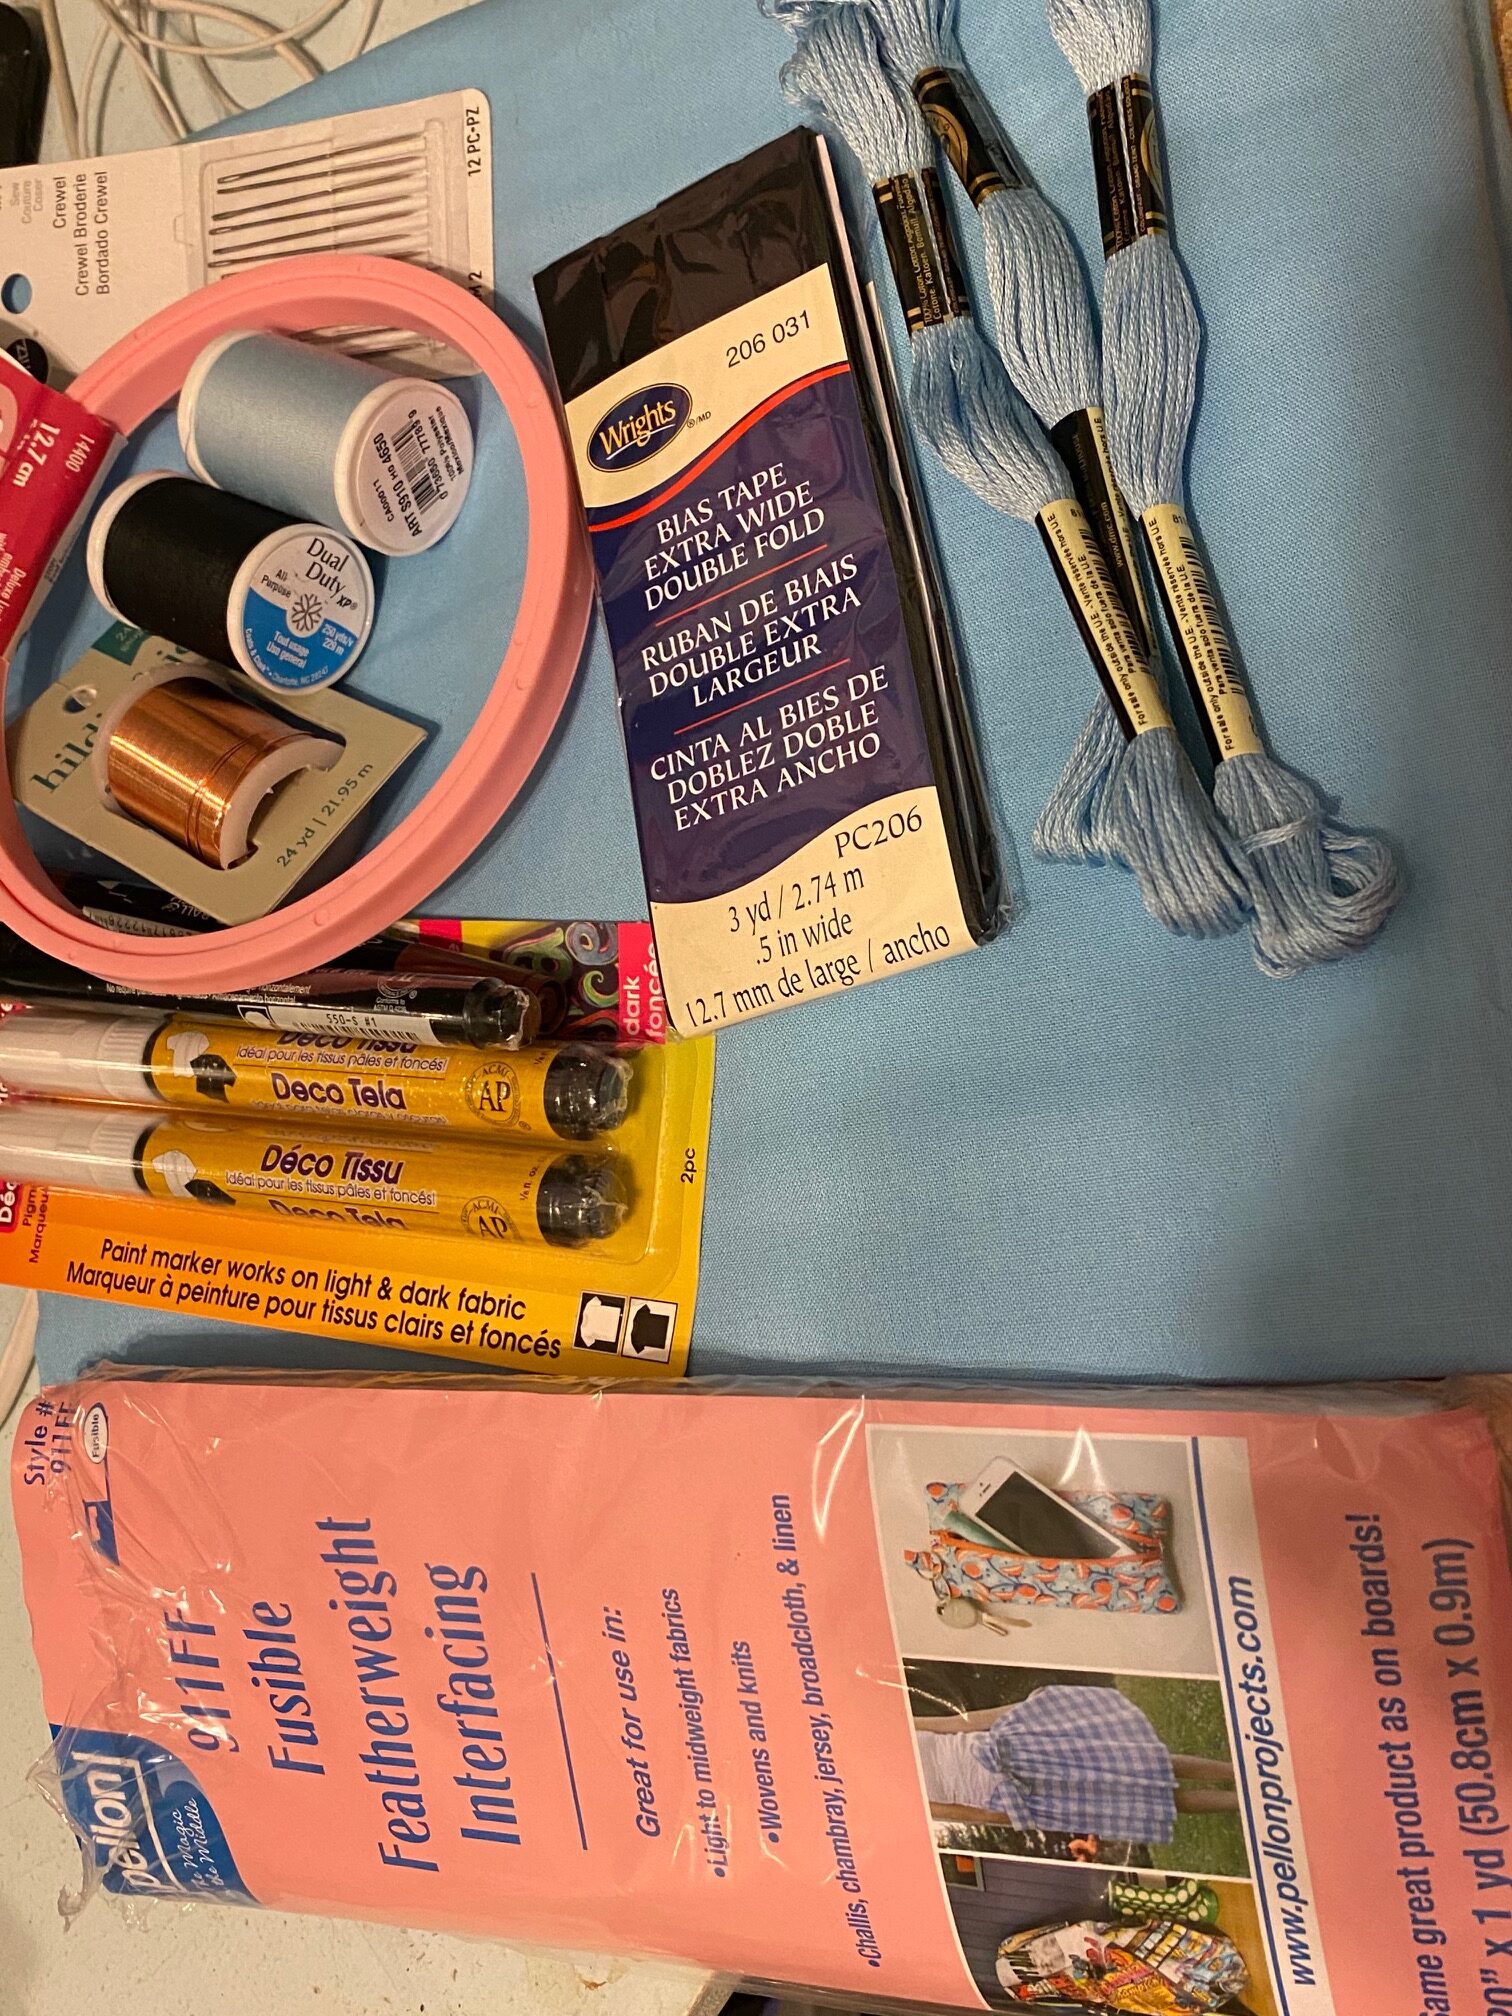
Tools required
Tailor’s pencil or regular pencil or transfer paper
Light box
Iron
Sewing machine
Embroidery hoop
Embroidery needle
Pattern
Right side
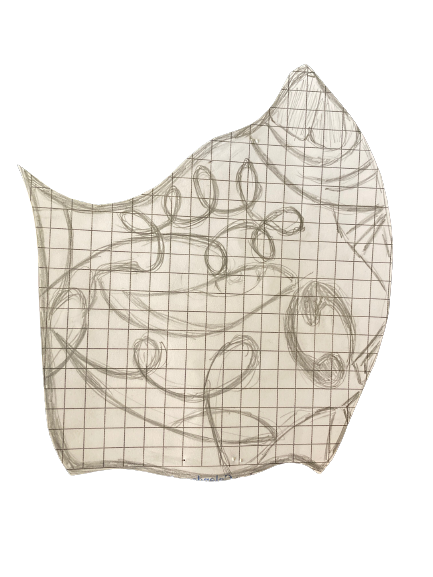
Left side
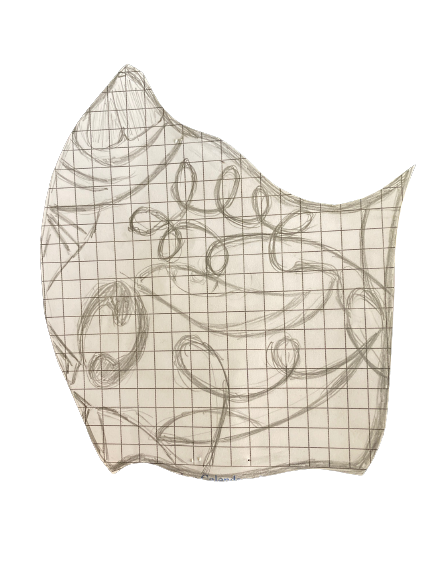
PLEASE NOTE that the pattern is drawn on ¼ inch graph paper; make sure your print is scaled correctly. The pattern DOES NOT include a seam allowance.
Instructions
Lining
- Cut each mask half from interfacing, leaving no seam allowance.
- Cut each mask half from blue fabric, allowing ¼ inch seam allowance on all sides.
- Fuse the interfacing to each mask half according to interfacing directions.
- Sew the two halves to each other with right sides together along the pattern outline (¼ inch seam allowance).
- Press seam flat. (it will help to use a balled-up sock or stuffed animal to hold the shape.)
- Set aside.
Front
- Cut a piece of fabric large enough for both mask sides plus seam allowance and extra to allow the embroidery hoop to hold successfully.
- Using the light box, trace the design from each pattern onto your fabric.
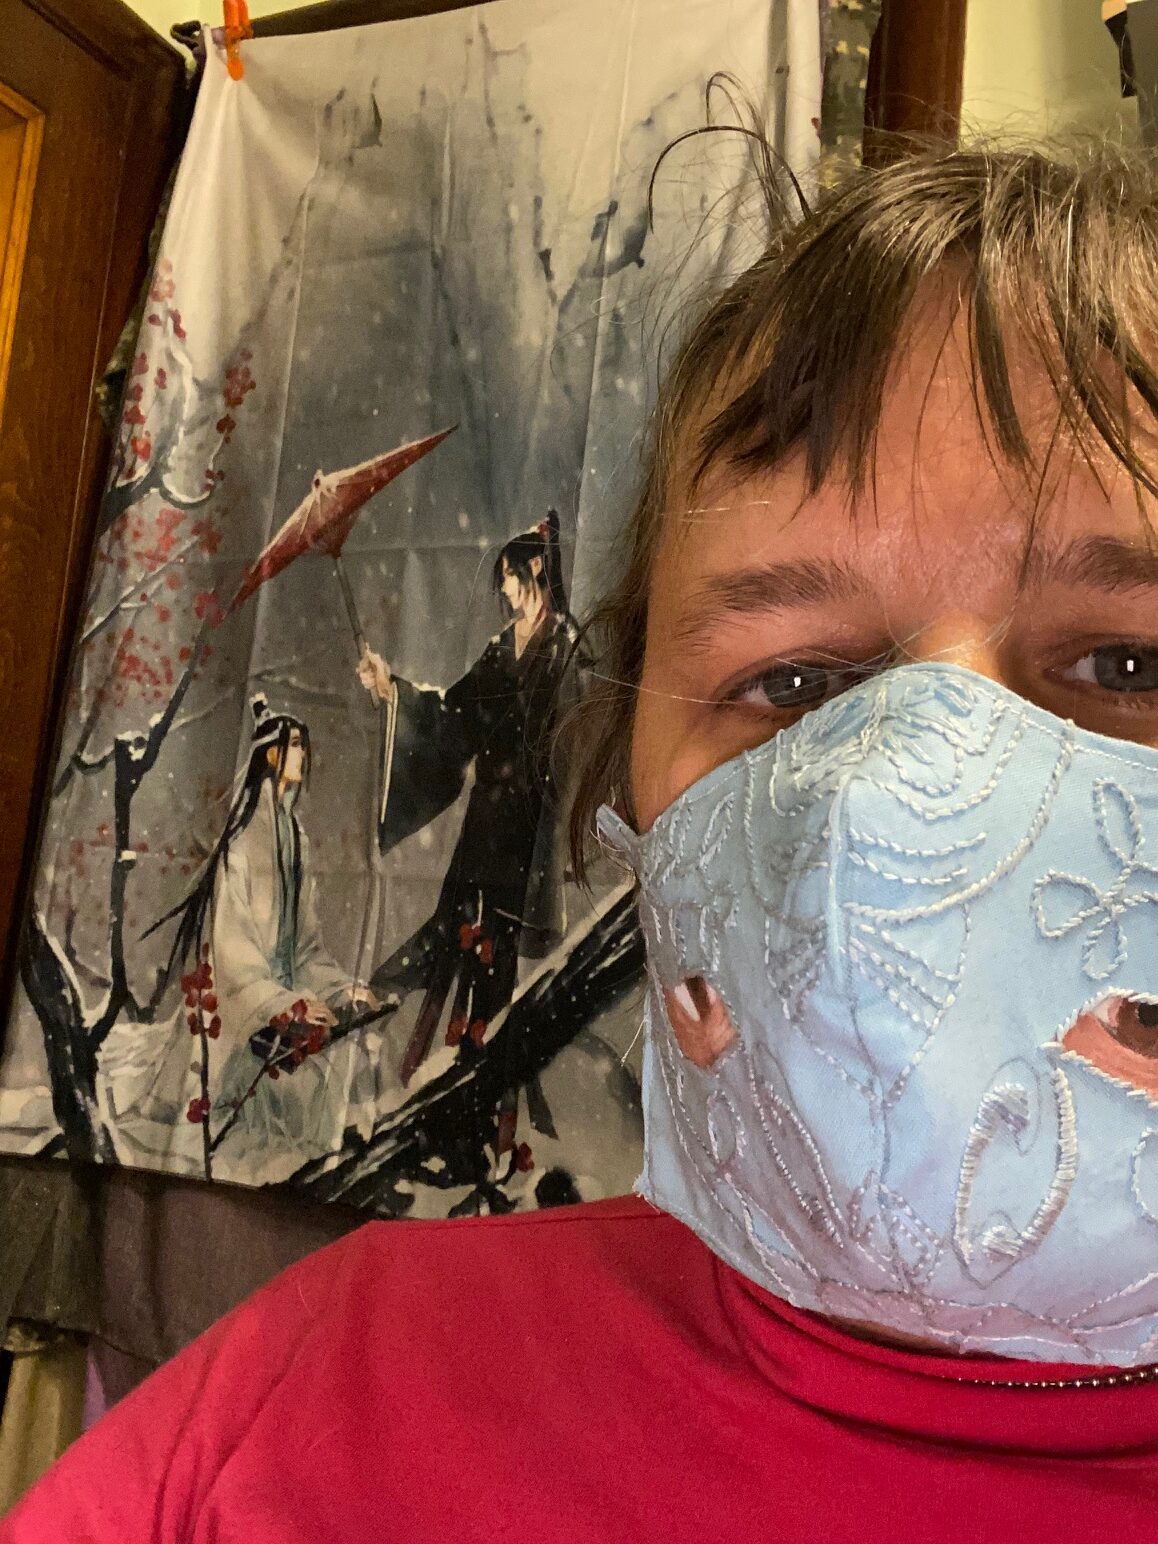
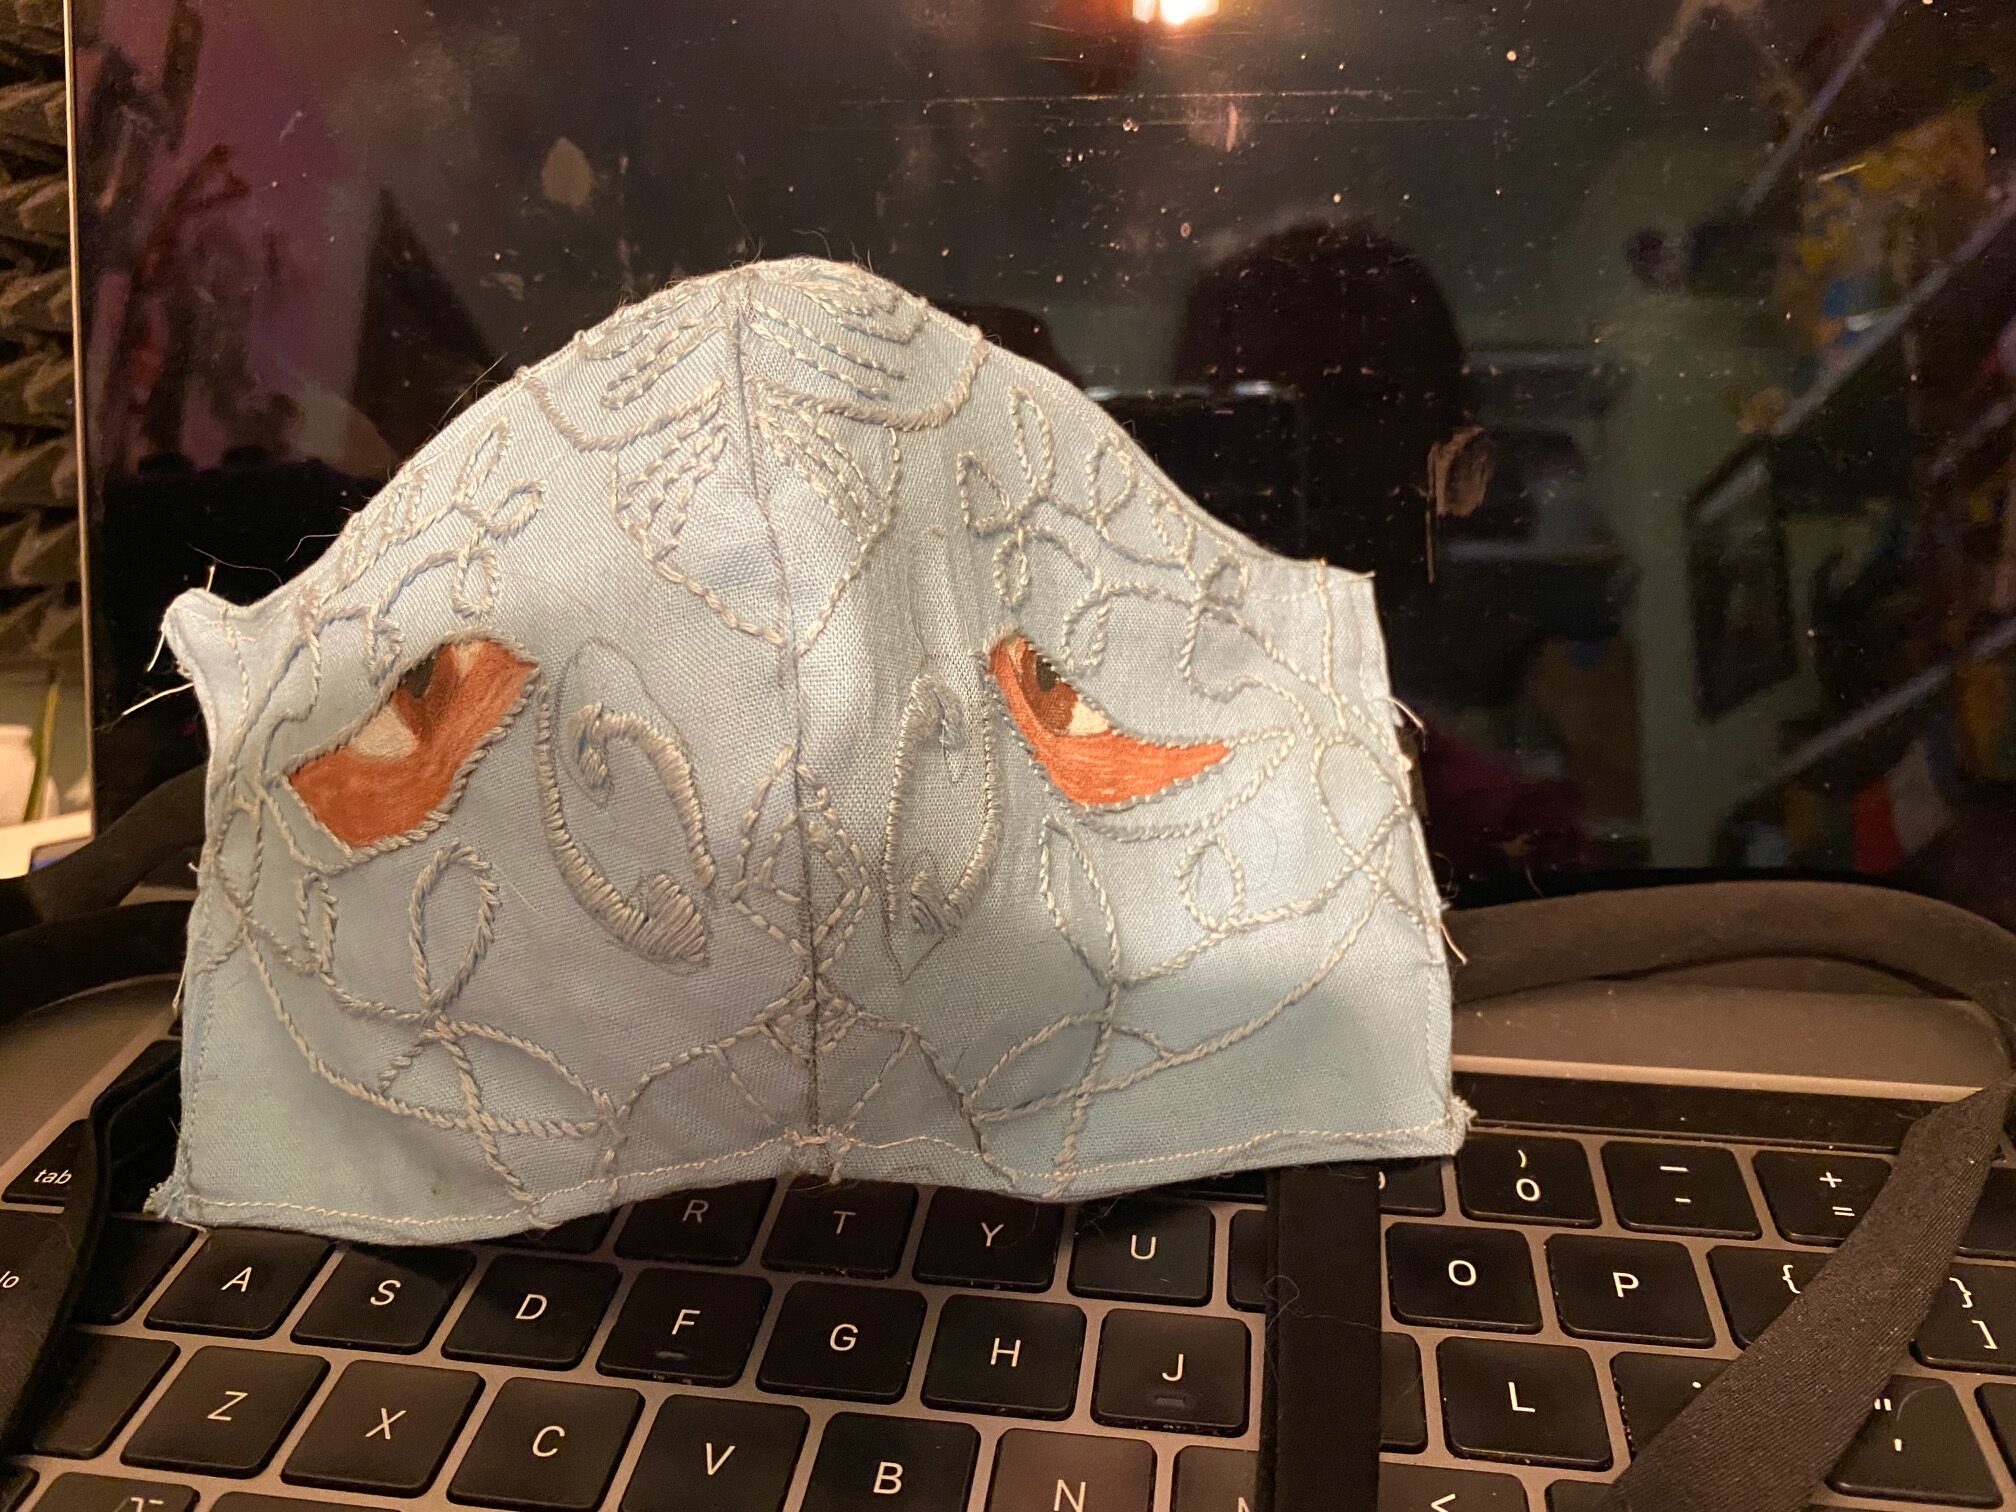
- Mount the design in the embroidery hoop such that the eye section is centered.
- Paint eye.
- Repeat for the other side.
- Let dry.
- Embroider along the pattern lines. I used stem stitch for the heavier lines, running stitch for the lighter lines, and satin stitch for the yin/yang symbols.
- Cut out the finished mask pieces. MAKE SURE to allow ¼ inch seam allowance around your work.
- Sew right to left with right sides together, matching the elements of the design, along the pattern outline.
- Press seam flat. As above, it will help to use something to hold the shape.
Assembly
- Pin lining to front with right sides together.
- Sew top and bottom seams along the edge of pattern leaving ¼ inch seam allowance.
- Turn right side out.
- Press all the edges into shape.
- Turn in ¼ inch on the ends.
- Cut 2 18-inch pieces of bias tape.
- Insert one piece of bias tape on each side. I lined them up with the eyes.
- Topstitch ⅛ inch from the edge all the way around to keep shape and attach the bias tape straps.
- Reinforce the stitching over the bias tape straps with a second row of stitching.